It was time, 7 years of
purple walls (make that 'Smokey Lilac'); from babyhood, through toddler mayhem, straight on to little kid...there's bound to be a bit of grubby on them walls. It was time for a makeover. The criteria was strict; it had to be cheap, fast, and easy. It also had to be transitional, 'cause we may not be long for the little green cottage, it looks like we just might be moving on -
more on that later. So there's that, and of course I had to consult Pony Girl.
She has told me that I may continue to call her Pony Girl "It's fine, whatever." But only until "The Muse strikes and something better comes along." Yeah, she said that.
She's going through a 'Red Period'. After I vetoed the red walls, I asked her for suggestions, "What do you want in your room?"
She said, "Butterflies, Surfer Girl, Animals, and Music."
The Mission:
Kid Room Makeover
Time Frame:
One Week. If you had the luxury of long uninterrupted days, you might be able to do it in 4.
Budget:
After painting expenses I allowed myself a budget of $50. If I had more time I would have lowered the budget by making more items.
The Vision:
Butterflies, Surfer Girl, Animals, and Music...and red.
O.k. I can do that; bring all those favorite things to life in one room - easy peasy. The key is color. I began by painting the walls a fresh light cream color.
Then we have the Neutrals: wood floors, wood furniture, cream and white, and a little gray. Then we bring in the main accent color RED. Then I added one more little pop of color with Turquoise.
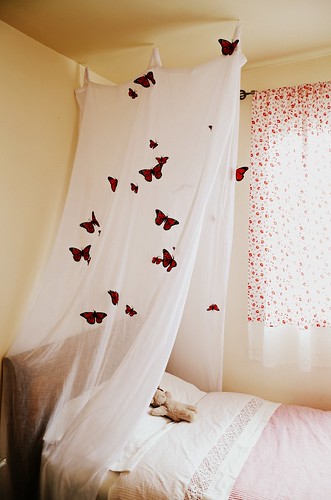
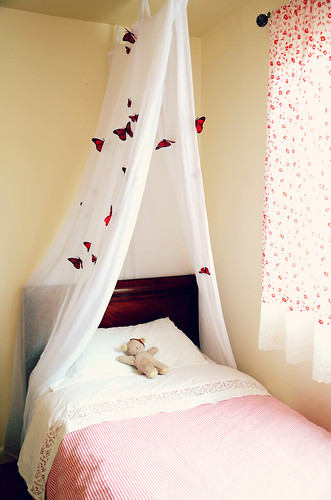
Let's start with butterflies shall we?
I made a sort of draping butterfly net over the bed by using 2 sheer tab top curtain panels that I had in my sewing space. I screwed a few hooks in the ceiling over the head of the bed and simply hooked the tabs onto to them. Then I found some red butterflies at my local craft store. The butterflies had long wires attached to them which I simply clipped short and stuck them into the curtain panels. Done!
If you don't have sheer curtains laying about, you could use fabric or even an old sheet cut in half length-wise, then sew some loops of ribbon to the tops. Not into butterflies? You could easily cut your preferred shapes out of felt or fabric and baste them on. Sea creatures, planets, birds, leaves, etc. would be pretty cool too!
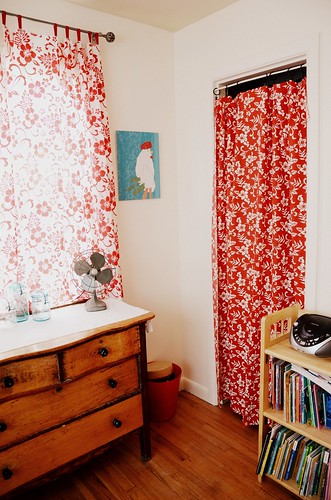
Now for 'Surfer Girl'. This was easily accomplished with a couple lengths of red and white Hawaiian fabric that I bought on the islands and have been hoarding in my stash. Now we have curtains!
For the window curtain I cut the length of fabric in half, quickly hemmed the cut ends and sewed loops to the two tops using bias tape/binding, you could use ribbon or twill tape as well. For the closet curtain I hemmed the cut ends of the fabric and used a spring loaded curtain rod with curtain clips. Done!
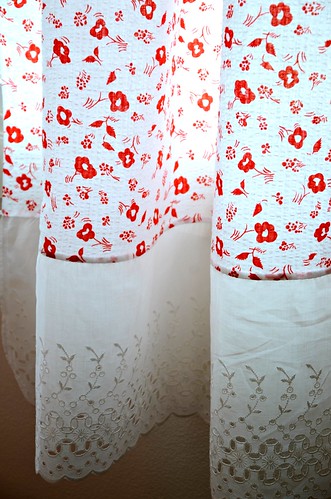
For the other window curtain it was pretty much the same process. I had some sweet white and red vintage seersucker fabric, but there wasn't quite enough to achieve the right length of curtains. So, I sewed some vintage white cotton eyelet to the bottoms of the curtain panels and Done!
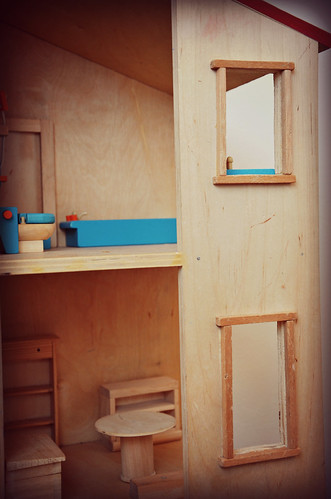
The inspiration for the Turquoise came from Pony Girl's dollhouse furniture. Plus, red and turquoise look great together.
Dollhouse handcrafted by the Engineer
Where were we? Oh yes, Animals!
I can not tell you how much I love this chicken! Collage is one of my favorite projects to do with kids, I love the endless art that can be created. Just grab some colored paper and have at it! This picture already had the perfect color scheme and it's gorgeous; I just popped it into an old inexpensive frame I had around the house, instant art!
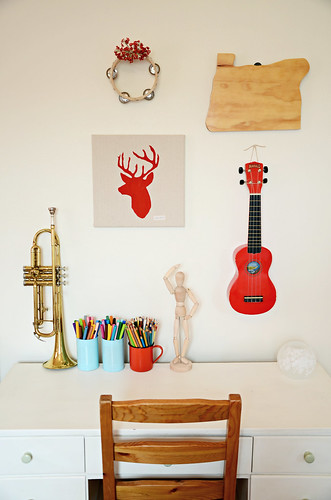
Animals and music over at the desk. The desk was originally found for free on the side of the road, given a fresh coat of paint and has plenty of drawers for storage of art supplies and such.
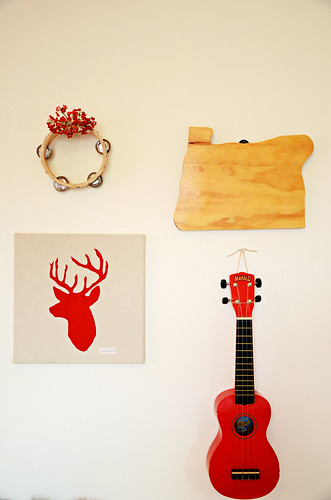
I spy 2 easy DIY projects. The wooden cut out of the state of Oregon was made by a family member. Simply trace your state, province, continent, onto a piece of wood, cut out with a jig saw, a little sanding and varnish and you got cool art!
I made the deer head by stenciling fabric paint onto a square of fabric scrap and stretched it over a cheap artist canvas and used a staple gun to secure it in place.
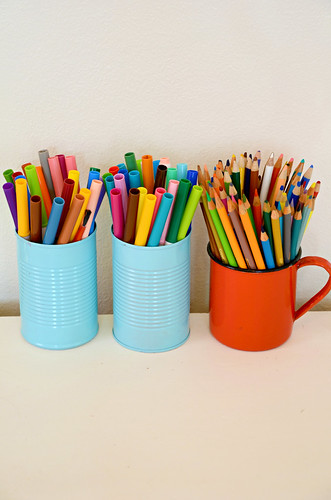
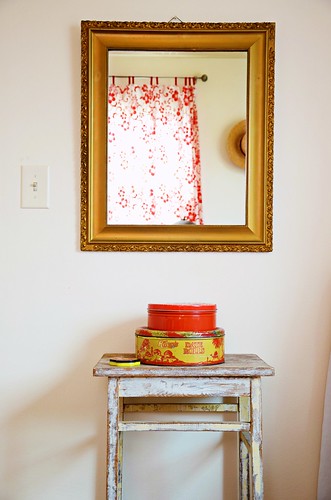
And of course I never tire of finding uses for spray painted food tins.
Next to the bed I placed an old end table with my grandmother's mirror. I used some vintage tins on the table to hold her rock and found treasure collections. Below the table is an old school locker basket to hold all of the current library books in one place (I realize that this may be a dream in the straw, but I'm hoping there will be less mad scrambling to find our library books come the due dates.)
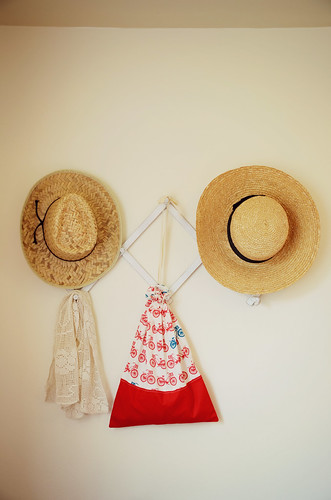
My Turquoise weekend bag was sacrificed to Barbie storage. An old collapsible peg rack found at the local thrift for $1.50 was ugly, but nothing a little paint couldn't fix.
Galvanized tubs at the foot of the bed make for great toy storage. You could hunt down some great baskets from a thrift store too.
And a little extra pop of color on the dresser with my grandmother's blue canning jars will become storage for my girl's bead collection.
So, what I bought for the makeover:
Butterflies from the craft store $7.00
Galvanized Storage Tubs from the big home hardware store $15.00
Hat Rack from the local thrift $1.50
I splurged on a new muted red and white stripe Duvet cover from Ikea since I didn't have time to make my own $15.00
Grand Total: $38.50
Not too shabby!
I hope that maybe some of these Cheap, Fast, and Easy DIY ideas have inspired you!
Do you have any Cheap, Fast, and Easy DIY projects that you love?


24 comments:
So beautiful and clean!!
hugs from Portugal,
Marlene
I so enjoyed this post...Wow, you have given us so many great ideas to run with in our own spaces. It is amazing that you did all of this and totally transformed for $38.50!
I don't have any projects off of the top of my head and nothing 'ever' as impressive as yours here.
So glad to hear that we may go back to calling her Pony Girl, at least until "the Muse strikes"..how cute is that?!
Have a great weekend my friend, maybe some relaxation is in order after, The great Redo. xo
What a lucky girl and a clever Mum! :)
Happy weekend,
Vivienne x
Well done you! I love working to a budget (good job really as I can't see this ever changing- unless a lottery win happens!) if nothing else you always end up with a unique space. The bedroom looks lovely! :)
wow!! how creative and beautiful and budget friendly...good for you, you are an inspiration!!
I am your 1000th follower!
pls follow back if you can.
thanks for the ideas.
That looks pretty darn fantastic! My girl has just asked for a "roof" on her bed, and by that I think she means the same sort of drapy canopy you have. I was thinking sheer curtains attached to a small hula hoop and hung from the ceiling, but I'm digging your method because I wouldn't have to track down a hula hoop. :)
Can you come over and sort my place out please?
I'm in decorating meltdown.
Ideas for boys?
Actually the music thing could be a winner!
That and some piratical overtones.....
Wow. All of that for under $50? Well done. It looks really beautiful and fresh.
Very grown up and cool! Absolutely love the red and the styling!
Looks wonderful!
truly lovely!
Can you come over and re-do my bedroom pretty please?
Such a gorgeous room! Love all the pretty vintage touches, and those butterflies are so neat! Great job! Have a wonderful weekend! xo Heather
oh I love this!! I so need to do this to Busy's room, get some more storage and have a good chuck out. It looks so great!
great inspiration-and that's about my current budget! :)
love the butterflies and the curtains~it all looks great!
Absolutely fantastic. My favorite part is the wall grouping above the desk. It all looks great!
It all looks gorgoeus - and no clutter!!!
Just wanted to stop by and say hello. I may not comment but I enjoy your posts. Stay Cool!
Great job it looks terrific, but where is all the junk?!
My girls' seem to have way too much 'stuff', the hoarder in me appears to have rubbed off on them. Ooops.
You have inspired me into a clear out if nothing else.
I'm very impressed that you came in so far under the $50 mark. Well done. It's a lovely breezy room now and the backdrop colour will make it easy to change when the colour love changes. I've done rooms for similar amounts and with my new move to a smaller rental have found that it is easier to look through my haul of roadside furniture for the correct fit rather than source new items within my budget. Love your style. Cherrie
i love this makeover you have done an awesome job. i am absolutely with you on the chicken. so so wonderful, the colours, the composition, the loose lines : ) thank you for sharing!
Gotta love a make over... can you come and do me!! I'm love turqoise and red together, a personal favourite x
It all looks marvellous. Lucky Pony Girl.
absolutely brilliant and inspiring! Love love love it!
Post a Comment